If you think that to have a fantastic room-by-room makeover, you will need to empty your pockets, then think again.
Take a look at these eight amazing DIY Sunday afternoon projects that will infuse the air of freshness and rejuvenation you are looking for. Without another word, here is how you can renew every single room in the house!
1. Living Room: Lovely Photo Frames
There is nothing more dull and boring than a blank wall. How many times have you thought about sorting out and organizing that pile of photos that keep waiting patiently stacked someplace?
A great idea is to have your favourite ones framed. Then you can easily arrange a photo gallery wall just above your mantle or over your couch or entertainment center.
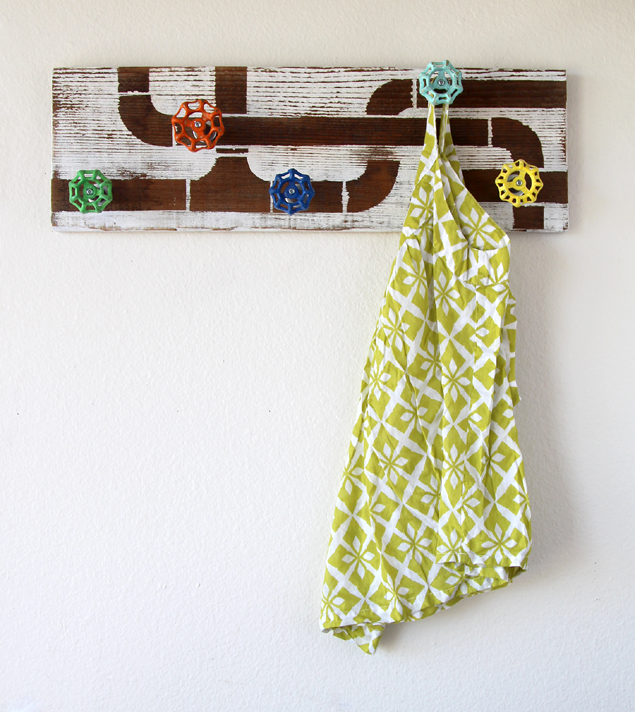
2. Entryway: Cool DIY Coat Rack
Create your DIY coat rack inspired by a vintage pattern I recently saw being sold online. The materials and tools you will need are:
- Pieces of reclaimed fence wood (pick the size you prefer depending on your space. Normally, any 1″x8″ wood piece will do).
- Old vintage faucet handles (you can easily find plenty of them on eBay, where I got mine).
- Masking tape
- Exacto knife
- 5/8” wood dowel
- screws
- keyhole hangers (of course, with matching screws)
- washers
- drill
- A power tool or handsaw is used to cut the dowel.
Just follow these easy steps to successfully create your DIY coat rack:
- Step #1: First, paint the faucets a different colour each; whatever you fancy! Then, with the plumbing pipes in mind (as a motif), you can create a graphic design element. At this point, you can make a sketch and have it as a guide. Then place some masking tape on the cutting mat and just cut out the shapes you will be using.
- Step #2: The tape will become your stencil as you place it on the wood board. Paint it any colour you like, and then give it a touch of vintage industrial appeal with a little sanding.
- Step #3: Cut the wooden dowel into approximately 3-inch pieces and stain or paint them the closest match to the wood you can. Drill a pilot hole in the middle of each dowel piece and attach a faucet in each one, and screw
- Step #4: Drill a small hole where you want to place the faucet handle (all the way through). Then drill a half-an-inch deep 5/8” hole centred on each small hole. This is for the dowel to fit. Secure the dowel with a long screw (from the back) and wood glue. Note: The washers on the front of every dowel piece (with the 5/8” opening) are decorative while the washers on the back provide the screws with a better grip; hence their role is functional. Attach 2-3 keyhole hangers, and you are set!
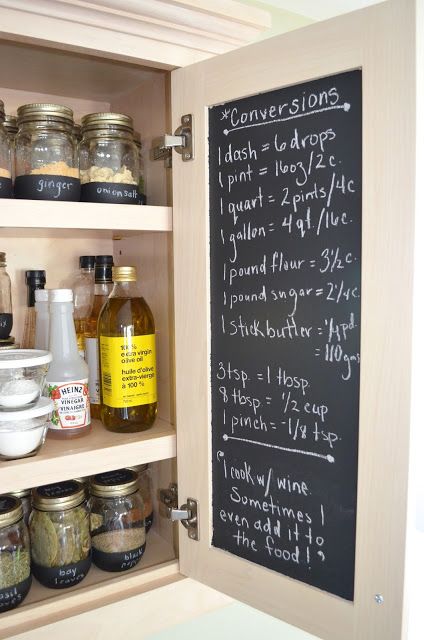
3. Kitchen: Smart Chalkboard
Chalkboards are a huge must-have and an upcoming trend that has been adopted by many homeowners. There is no need to pay extra bucks to buy one.
You can easily make one on the inside of your kitchen cabinet. Just take a little chalkboard paint, and voila! A place to write anything you need to have handy, from your grocery list, pictures, and to-do lists to phone numbers, travel mementos, posters, postcards, and recipes!
4. Bedroom: Spruce up the Room with Pillows
Jazz up your private space with a few pillows, which is the next best thing to refresh the room after buying a new bedspread or a DIY headboard (see these amazing ideas to make headboards from old window blinds!). You can walk to the nearest fabric store to select your favourite patterns, or you may also use old dish towels or napkins if you are running short of cash.
Here’s a list of materials you need:
- Fabric
- Velcro fabric fusion
- Fusible bonding web
- Pillow insert
- Iron
- Fabric scissors (although not necessary, it is always recommended to invest in a fab pair as they cut fabric much easier than any other).
Instructions:
- Measure the pillow insert and add an inch to the width and 3 inches to the length so that you have room to work with it and create a back envelope opening.
- Your fabric should have a top and a bottom, Lay your cut fabric out with that in mind, and cut the back piece in half. That is going to be your envelope opening. Hem the fabric along the edge and cut.
- Take a damp cloth and heat your iron (wool setting). Then lay the fusible web and fold the fabric., before you place the cloth on top. Hold the iron there for about 20 seconds or less until both sides are hemmed properly.
- Lay the pieces down and make sure they are crossing each other by about ½ an inch.
- Trim all the excess fabric so the bottom and top are the same length. This is why we wanted those three extra inches for the length measurement!
- With your iron set to wool setting, use the washcloth (damp) and the fusible bonding web and start sewing the side with the pattern together going all the way around the pillow outside the edge. Then, add the Velcro to the opening, which works the same as the fusible bonding web. The only difference is that you increase your iron setting to the maximum setting (with steam).
- Cut out three pieces of Velcro, peel the sticker off, and place them on the fabric (a piece in the middle and one piece per end).
- Place the iron on top and hold it right there for about 90 seconds, making sure you hold pressure and move it back and forth from time to time.
Note:
If you are using delicate fabrics, you should protect them from scorching by placing a piece of fabric on top when doing this job. You can wash your pillows in the washing machine, but it is much more preferred to hand-wash, just in case.
It is amazing how easy it is to make from king-size shams to cute cushions for the guest room, they don’t require ANY sewing expertise! Now, if you want to make your bedroom look even bigger and super cozy with fantastic design ideas, we got you covered!
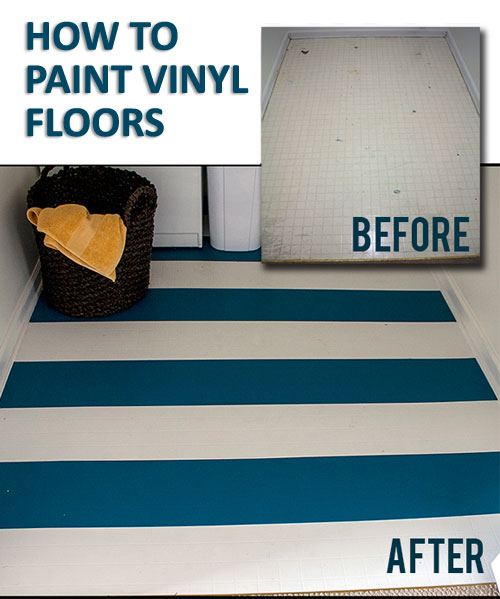
5. Laundry Room: Paint your Vinyl Floors
A ridiculously easy and quick way to transform your laundry room’s ugly and flat vinyl floors is by following these steps. It is not as big of a deal as painting the walls, and each step doesn’t take more than 10-20 minutes, so here we go!
- Take an afternoon off and start by choosing the colours to use. A striped pattern is always chic and trendy, and you could escape the classic black & white, you can opt for charcoal gray and antique white. Just a quart of each will do. Before we start, make sure you have purchased PORCH floor paint to ensure a more long-lasting effect that can withstand heavy foot traffic.
- Clean the floor area. If you have enough space, you can scoot the dryer and washer out of their position to paint underneath them. If not, just leave them sitting where they are and work your way around them (it will not look good, though, after you finish) or move them to another room for a day or two (recommended). Then clean the floor from dirt and dust. You may want to use a heavy-duty cleaner, such as TSP, but it is not necessary. Any floor cleaner will do just fine.
- Prime the floor with any primer you choose (I stick to General Purpose Interior Primer by KILZ) by pouring the primer on the floor (one coat is enough). Spread it with the help of a paint roller and let it dry overnight.
- Paint the entire floor with the antique white (two coats). Don’t worry. It is a fast-dry color, and you can speed things up with a large box fan. You can easily apply two coats in one day. Let it dry overnight. This is perhaps the messiest part of it all, so prepare to get your feet dirty!
- Use a regular blue painter’s tape to tape off your stripes (take careful measurements so that your stripes are even in width). If any bleeding occurs, you can fix it with a paintbrush (cut in along the stripes). To avoid these instances, you can add more white color over the floor-paint over the tape. It works…for sure!
- Paint the stripes with the charcoal gray colour (two coats), allowing the first coat to dry completely before applying the second one. Remove the tape once the stripes are dry. It may sound like a lot of work, but steps 5 and 6 only took me 15 minutes or less!
As for all the steps combined, the process didn’t take more than 2 hours if you leave out the drying time.
Extra Bit:
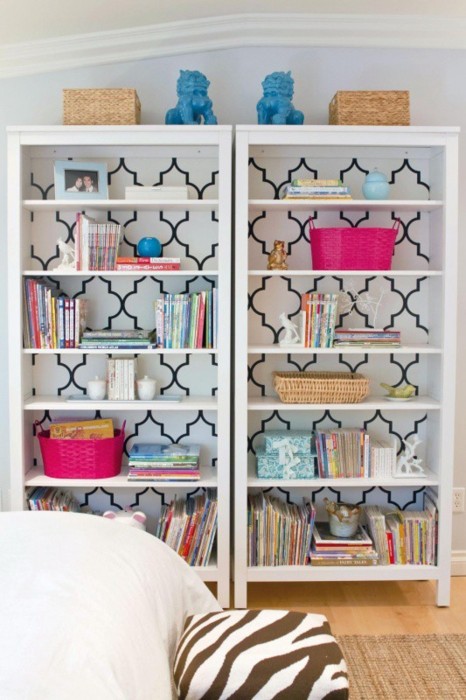
Another great idea to renew your home office is to have a patterned back (i.e. clean stenciled herringbone lines), be it your bookcase or any other piece of furniture. That way you finally de-clutter your shelves and make your office a much more inviting place!
Want more DIY projects that can give a breeze of fresh air to your home? Here are 18 DIY projects fro less than $50!
